
Previously published in the December 2006 issue of MagKnits.
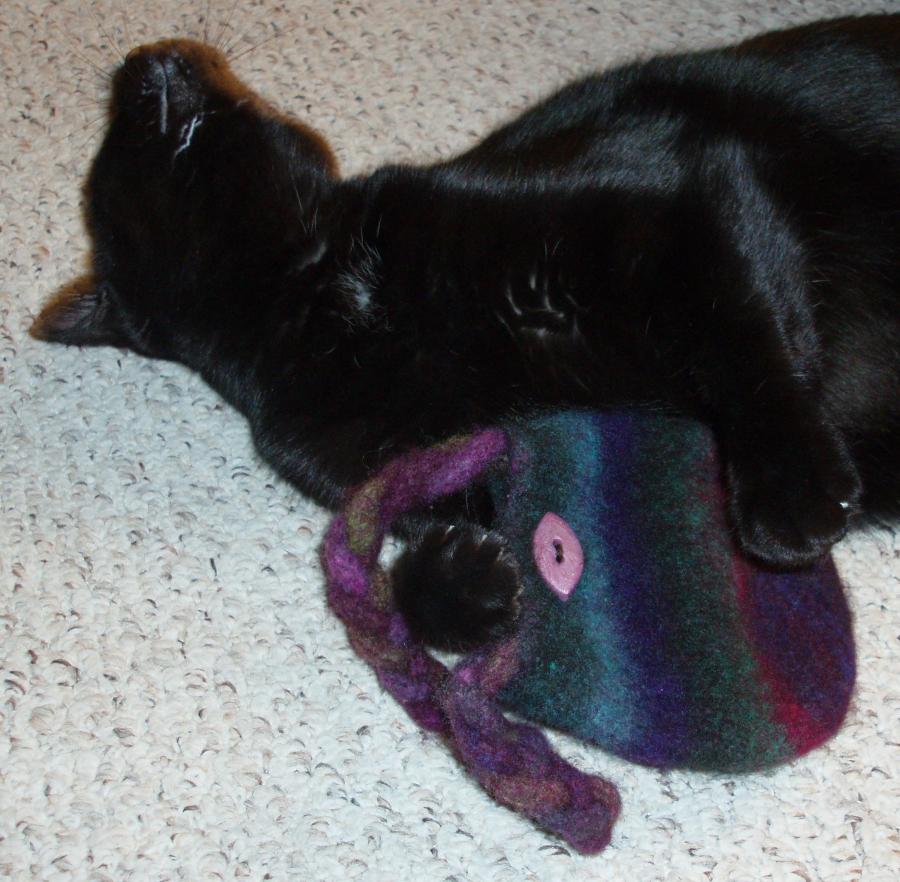
I often end up with a stray skein of Kureyon and no good plan for it, so I developed this little bag to use up those stray single skeins. I called the bag “Kureyon-Chan” or “K-Chan” because it’s small and cute. Kureyon-Chan is perfect for your cell phone, credit card, ID, and keys when you don’t want a large bag.

Difficulty level
Simple
Size
Approx. 5.5-6″ [14-15cm]wide and 6.5-7″ [17-18cm] tall after felting
Materials
1 skein Noro Kureyon (100% wool; 110 yd [100 m] per 50g
16″ (40cm) size US 10.5 [6.5mm] circular needle
US 10.5 [6.5mm] double pointed needles4 stitch markers (one should be a different color from the rest)
stitch holder or scrap yarn
tapestry needle
zippered cotton pillowcase
large safety pin
sewing needle and embroidery floss to coordinate with bag
button (optional)
X-acto knife or sharp scissors to cut buttonhole (optional)
Yarn substitutes
Brown Sheep Lamb’s Pride worsted, Malabrigo Merino Worsted, Manos del Uruguay, or Cascade 220
Gauge
Not important for this design as long as fabric is loose enough to felt well
Special instructions
The strap is knit and felted as three separate pieces of i-cord, then braided and sewed to the other side of the bag. Don’t be tempted to braid the straps and sew the loose end onto the bag before felting! Two things will happen. First, you will lose much of braid detail. Second, because Kureyon twists as it felts, the strap ends might not end up evenly spaced after felting.

Pattern
Bottom
Cast on 16 stitches using the long-tail cast on. Knit every row until you have 17 ridges on each side. Place a marker. Pick up and knit 16 stitches along the edge of your bag – you will be picking up a single loop of yarn at the end of each of the ridges. You should be at the beginning of the cast on edge. Place another marker.
Pick up and knit 16 stitches using the loops at the bottom of the cast on row. Place another marker. Pick up and knit 16 stitches along the last edge of your bag. Place the fourth, differently colored marker to denote beginning of rounds. Round 1 of the body of the bag is completed and you should have 64 stitches.
Body
Rounds 2-9: Knit.
Round 10 (decrease round): (K2tog, knit to two stitches before the next marker, SSK, slip marker) around. 56 stitches.
Rounds 11-19: Knit.
Round 20: Repeat decrease round. 48 stitches.
Rounds 21-29: Knit.
Round 30: Repeat decrease round. 40 stitches.
Rounds 31-33: Knit.
Round 34: Purl.
Round 35: Bind off in purl. When you reach your first corner marker, remove it and bind off until you have six stitches remaining before the second marker. Purl the next two stitches together and continue to bind off, removing the second marker when you reach it.
When you reach the last corner marker before the beginning-of-round marker, remove it. Purl (not binding off) to the center two stitches and purl these two stitches together. Purl to beg-of-rnd marker and remove it. You should have 9 live stitches.

Strap
Put the first 3 stitches (one of which should have the working yarn attached to it) onto a double-point needle and slip the other 6 stitches onto a stitch holder or piece of scrap yarn.
Do not turn your needle. Slide your 3 stitches to the right end of the needle and knit across them. Keep knitting i-cord until you have 16-20 inches [41-51cm]. On the next row, knit the first 2 stitches together. On the next row, knit the remaining 2 stitches together, cut the yarn (leaving about a two-inch tail), and draw the tail through the final stitch. Use your yarn needle to thread the tail up the center of your i-cord. The first strand of your strap is done.
Slip the next 3 stitches from your stitch holder onto your double-point needle. Attach your yarn and knit i-cord as for the first strand. After you complete the second strand of your strap, do the same for the final 3 stitches on your stitch holder.
When you have completed all 3 strands of the strap, turn your bag inside out and weave in any ends.
Felting
Place your bag into a zippered cotton pillowcase and felt in hot water according to standard felting procedures. Periodically untangle the i-cord. When you can’t see much if any stitch definition, shape your bag by stuffing it with plastic bags and let it dry.
Attaching the strap
Turn your bag inside out. Braid the three strands of the strap until the strap is the length you want it. Flatten your bag and use a safety pin to attach the strap to the bag opposite the attached strap end.
Sew the strap on with embroidery floss. If your stitches are small, they will not be noticeable on the right side of the bag. When your strap is secure, knot and cut the embroidery floss.
About one-half inch (1 cm) below the spot where you sewed the strap, cut off the excess bits of i-cord and remove the safety pin. Turn your bag right side out.
Your bag is done! Unless, of course, you want to add a button…
Button (optional)
Figure out where you want to sew your button on the inside of the bag, near the top. Put your safety pin in to mark the spot. On the opposite side of your bag, figure out where the buttonhole needs to go and how large it should be. Your buttonhole should be slightly smaller than your button.
Carefully cut a small slit for your buttonhole. You can use a sharp scissors or an X-acto knife, but be sure to put a piece of cardboard inside the bag so you don’t cut through the other side! Sew your button inside the bag.
About the designer
Chris lives in Uptown, Minneapolis, MN, and works as a systems analyst for a small telecommunications company to support her yarn habit and her cats, Chaos and Mayhem.
One thought on “Kureyon-Chan”